I headed to Julian's on Wednesday for our long-awaited second go at Denmark Strait and, more importantly, our first test of "Seekrieg 5".
 |
| Hood leading followed by Prince of Wales |
As with the first re-fight of this action, the floor of Julian's wargames room transformed into the Denmark Strait and we set the Prinz Eugen/Bismarck and Hood/Prince of Wales at the appropriate distance, at 1:6000 scale, to represent the situation at 0537. Once again, we moved the ships, at 28 knots (1 cm per knot), according to their tracks in the historic engagement, with turns conducted according to the mechanics in the Seekrieg 5 rules.
 |
| Map of action "The Battleship Bismarck" by Ulrich Elfrath and Bodo Herzog, from Don Hollway's Pursuit of Bismarck website. |
Hood turned, slightly less than 45º to starboard on the first turn. The Prince of Wales following her two minutes later. The two continued on this new course for a further eight minutes (four turns), then, at 0549, they turned a further 10º to starboard so as to better intersect the expected tracks of the German ships.
 |
| HMS Hood began the action with a salvo from her A and B turrets. |
At 0551, Hood opened fire with her A and B turrets, targeting the lead German ship (which, unknown to the British Admiral was the Prinz Eugen, rather than Bismarck, the two having change position during the previous night). The rules produced a credible 7% chance of a hit, with four rounds of fire (four rolls of percentage dice) in the two minutes of a turn. No hits were scored (as was the case in the historic action).
 |
| From k.bismarck.com: "Two 15-inch shells from the Hood land close to the Prinz Eugen during the initial phase of the battle of the Denmark Strait. This photo was taken by war reporter Josef Lagemann from the after 10.5-cm Flak position on the starboard side." |
0553: Prince of Wales now opened up as well, targeting the rear ship (Bismarck) while Hood still fired at Prinz Eugen. Slightly better chance (around 17% from memory), but again, all misses.
 |
| Both British ships firing their forward turrets, while closing the range. |
0555: Another salvo from each of the British battleships missed once more. Prinz Eugen opened fire on Hood (lead British ship), scoring one hit that did not penetrate the British battlecruiser's armour.
I did not take any photos during this part of the game as I was enjoying the game, the rules, our discussions and laughing at my inability to roll anything lower than a 40 or so with percentage dice!
 |
| The critical point of the action: the British ships make a 20º turn to port so as to open up their broadside and hence enable their rear turrets to fire. This was the moment that sealed Hood's fate in the historic action, when a lucky shot from Bismarck pierced her deck and caused an explosion. |
0559: Hood and Prince of Wales turned to port 20 degrees. Prinz Eugen fired on Hood once more, scoring two, non-penetrating hits, one to the deck, the other to a barbette; 80 points of damage. Bismarck opened fire... and missed. A divergence from history—as occurred in our previous re-fight of this battle. The British ships continued to fire on their German foes with the additional batteries (turrets) yielding immediate benefits. Hood scored two hits on Prinz Eugen, on the superstructure (110 points of damage) and knocking out a secondary turret (along with a further 100 points of damage). The Prince of Wales hit Bismarck, twice; on the belt and engine room. The latter hit started a fire and reduced the speed of the German battleship by 1 knot.
0601: The ships, now running parallel, exchanged broadsides. Prinz Eugen scored two hits on Hood, to belt and a turret. Once again neither was able to penetrate her armour; 40 points of damage. Bismarck also hit Hood—twice. The first on the belt failed to penetrate and detonate. The second penetrated and detonated in X turret, knocking it out.
For her part, Hood, now firing on Bismarck, failed to hit the new target. However, the gun crews on the Prince of Wales had their mark, scoring four hits on Bismarck. A penetrating and detonating hit to the belt end, pass-through hit on the superstructure, a penetrating and detonating hit on a barbette and a second, penetrating and detonating hit on the belt end. A total of 400 points of damage but, more importantly, another fire, the loss of a secondary barbette and the hits to the belt caused her to list and left her, in the short-term at least, unable to fire her guns.
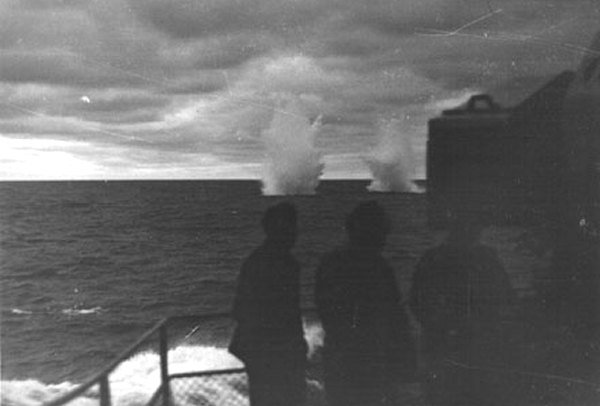
 |
| Hood and Prince of Wales both fired broadsides at Bismarck, the latter scoring four hits, starting another fire on board the great German battleship (just visible through the morning mist at top, slightly left of centre) and, temporarily at least, silencing her guns. |
 |
| A zoomed view, showing the smoke from fires on Bismarck, Prinz Eugen ahead of her. |
That ended the game/action for us. There was a little more to play out but I needed to get home and it was clear that Bismarck was 'gawn'. She was down to 27 knots and her guns were silenced for the immediate period. The British ships would close in again. Now, both having their mark, the likelihood of at least two hits each was extremely high. This would devastate Bismarck further, with no reply possible. If it did not sink her or force her surrender or, more likely, to be scuttled, then the British ships, aware of her plight, could slow, focus on their target and pound her to Davy Jones' locker. If, remarkably, the action continued long enough, the cruisers Suffolk and Norfolk would come into the action too. We assumed that, as per the later phases of the historic action, Lütjens would order Prinz Eugen to disengage and head to safety.
Observations
The battle
Holland's brave and dangerous tactic to 'charge' the German ships so as to close the range and the extreme luck/bad luck associated with Bismarck's catastrophic hit on Hood in the historic battle stand in stark relief. We have now played out the battle twice and each time Bismarck has missed. This would not only have changed the result of the battle, but the careers/memory of the respective admirals, not to mention the lives of those on board the respective ships.
The rules
Once again the game was superb; even more so this time as the rules suit us far, far better. Seekrieg have a 'reputation' for being complex. They are not. One could say 'involved', but they flow beautifully. Neither of us had used them before, save for an attempt to work out the process of firing last time that we re-fought Denmark Strait. This had not been easy as we were switching between various pdf files (Julian had purchased the electronic version of the rules), which made it really difficult as we were fumbling around in a most unsystematic manner, trying to get from one step to another. This time it was different.
Julian had printed the rules. We took a bit of time to calculate measurements of movement and ranges in metric and it took us a while to work through the steps in firing/assessment of damage (chiefly to find the relevant tables to look up), but once we had that worked out the turns and the firing just flowed.
Many people assess a set of rules based on achieving the 'right' or at least a credible result. This is a key, but as important, or I would say more important, is the path to achieving the results.
With Seekrieg you determine chance to hit, location of hit, whether each shell that hits is capable of penetrating the armour at the location of the hit and, if it is, whether it detonates or passes through. This causes various levels of damage and, most importantly, 'damage effects' (what is commonly referred to as 'critical hits' in other sets of rules).
This sounds involved, but is not. Firstly, with Second World War naval one is dealing with a few or a handful of ships and each only fires a shot or three, so one can afford to be more detailed and still get through an action in a reasonable time (for us), to get the ‘right’ result, but also have a pathway to it that tells us more about how and why that result occurred. Secondly, the authors of Seekrieg have gone to a lot of trouble to make this process a series of simple steps, with simple addition and subtraction mathematics and a handful of tables to look up. The last of the steps in determining hits/damage is one of the best examples of this. The authors have devised Table M1. It took us a while to find it as it was not in with the other charts. Then Julian recalled and found it, in a separate file. This is because it is 17 pages long with 149 tables. The tables are grouped so that a set of them refer to hits at different locations on different classes of vessel. In fact, thinking more about the game and the rules I began to wonder, are Seekrieg too simple?
I went from answering "yes" to answering "no" to coming to an interim conclusion of "most likely not"! I was originally thinking "yes" as I thought, hang on, for the ‘key’ table H1 (determination of hits) one merely puts a few, simple modifiers on the most important factor of the ‘fire control solution’. How superior is this to the base 12%-type mechanic of "General Quarters"? Then I considered it more and thought, of course it is. The fire control solution is all about the firing ship, guns, range, speed of target, then the ’tweaking around the edges’ provides the rest of the modifiers to produce a factor which, with the number of shells (barrels) fired each round, produce the chance of any of them hitting. So I am at "no". Ah, but then the niggle came in. Hit determination is still a fairly crude ‘it’s raining shells’ do any of them hit the target? Could this be done per shell? Is that feasible or desirable? Hang on, once a hit is achieved then it *is* determined by each shell/hit. Big tick (and that was a beaut part)! So it is likely that they are detailed enough. Of course, the rules have also been better thought through than by me who has played one game and not read this version yet! 😳 So, my answer for now is "most likely not" (too simple). I shall be interested to see whether, with actually reading the rules and then using them a few more times, it moves to a firm "no" or shifts to "not, in the main, but I’d like some more detail regarding determining whether and where each shell from each round hits". We shall see and it is gonna be fun finding out!!
Details
Rules
Ships
1/6000 scale Figurehead Ships.
Information about the action


Very interesting report James and a fantastic way to test a set of rules with the movement and firing choices from an actual battle.
ReplyDeleteIt's a beaut approach to re-fighting an historic action that I have seen others use for land warfare. Julian set it up the first time that we tried Denmark Strait and it was marvellous. Puts a clear prism of what occurred according to the historic record to set over the game version.
DeleteA very long-awaited and hugely enjoyable day on my part - finding these rules has ended the quest of a lifetime to find a comprehensive yet playable set of WWII naval rules. Seekrieg V seems to me to strike the right balance between complexity and playability. I am very much looking forward to future actions.
ReplyDeleteWell done Julian, you are there—and I am hooked too!!
DeleteGood to land on rules that work for you. I believe you will continue to do well with them. Try some smaller ships and see how it goes.
ReplyDeleteThanks Joe. No immediate plans for actions with smaller ships, but those such as Savo Island and the naval battle of Guadalcanal beckon in the future.
DeleteInteresting and entertaining report, James. I'm guessing that because you played it out on a floor the rules require a big area or is that not necessarily the case. Despite what some people think, sometimes a good set of rules benefit from tables. I'm looking forward to more of these reports.
ReplyDeleteThanks Richard, pleased that you found it interesting.
DeleteThe rules allow for a host of scales to suit taste, space and aims. Ranges and movement are provided for 1:36 000 up to 1:300, so you can use from a dining table to a hall.
We prefer to use the 'natural' scale of the ships, hence using the floor at Julian's with 1/6000 models to represent an area of sea of around 25 km x 12 km—he has specialised in large-scale figures (in a geographic sense, so 2 mm and the likes in our wargaming parlance), so only has a small table. Having the space to do this gives a real sense of the huge expanse of ocean or sea, the relatively tiny ships and the huge ranges of the guns.
Having Julian's 1/6000 ships and our combined 1/700 will allow some telescoping scales to zoom in for detailed attacks on carriers and such and zoom out for surface actions.
Looks like you got your go-to rules for the period. It’s a big step to enjoying the genre once that happens. 😀
ReplyDeleteYeah, we reckon that we are there for surface actions for sure.
DeleteI like the painted battered wooden floor standing in for the ocean and sounds like a great game!
ReplyDeleteBest Iain